
Create the app registration
Register an app in Microsoft Entra ID, add the redirect platform, grant the Graph permissions and copy the IDs the desktop app needs.
The desktop app signs in through an app registration that you create in your own Microsoft Entra tenant. You own it, you control consent, permissions and Conditional Access, and you can delete it at any time. It is free, needs no Azure subscription and gives us no access to your tenant.
This page walks through the five parts in order. The app's setup wizard shows the same steps, so you can follow along in either place.
Doing this for someone else? Work through the whole page, then send them the Application (client) ID and the Directory (tenant) ID from the last step. Who can do which part is explained in Before you start.
Create the registration
The registration is the identity the app uses when it signs in to your tenant.
Open App registrations
Open the Microsoft Entra admin center and go to Entra ID, then App registrations.
Start a new registration
Select New registration and give it a name, for example Intune Documentation Desktop.
Choose who can sign in
Under Supported account types, choose Accounts in this organizational directory only (single tenant).
Register
Leave Redirect URI empty and select Register. You add the redirect address in the next part.
Entra opens the Overview page of your new registration.
MSPs create one registration in each customer tenant. To switch tenants, you enter that tenant's client ID and tenant ID in the app and sign in again. See Work with multiple tenants.
Add the desktop platform
The app signs in through your system browser, and Microsoft sends you back to the app through a local address. This part tells Entra that address is allowed.
Open Authentication
In the new registration, open Authentication.
Add the platform
Select Add a platform (in the newer view, Add Redirect URI) and choose Mobile and desktop applications.
Enter the redirect URI
Under Custom redirect URIs, enter this address exactly, with no port and no trailing slash: http://localhost
Then select Configure.
Leave public client flows off
Keep Allow public client flows set to No. The app does not need it.
Use Mobile and desktop applications
Do not use the Single-page application platform. That is what the website uses, and it does not work for the desktop app. A wrong platform shows up as error AADSTS50011 when you sign in.
Why no port? The app listens on a random free port while you sign in. Microsoft ignores the port for localhost addresses, so you only register http://localhost once.
Add the API permissions
These permissions let the app read your Intune configuration through Microsoft Graph. Every one of them is read-only, and the app never writes to your tenant.
Open API permissions
Open API permissions and select Add a permission.
Choose delegated Microsoft Graph permissions
Choose Microsoft Graph, then Delegated permissions.
Add all nine permissions
Search for and select each permission in the table below, then select Add permissions.
| Permission | Why the app needs it |
|---|---|
User.Read | Sign in and read the signed-in admin's profile. |
DeviceManagementConfiguration.Read.All | Configuration profiles, settings catalog, compliance, baselines and templates. |
DeviceManagementApps.Read.All | Apps, app protection and app configuration policies. |
DeviceManagementManagedDevices.Read.All | Device counts per assignment. |
DeviceManagementRBAC.Read.All | Scope tags, roles and role assignments. |
DeviceManagementServiceConfig.Read.All | Enrollment configurations, Autopilot and tenant service settings. |
DeviceManagementScripts.Read.All | PowerShell and shell scripts, and remediations. |
Group.Read.All | Resolve assignment group names. |
Policy.Read.All | Conditional Access policies. |
Delegated, not Application
Choose Delegated permissions, not Application permissions. With delegated permissions the app reads only what the signed in admin is allowed to see.
Grant admin consent
Consent approves the permissions once for the whole tenant, so nobody who uses the app sees a consent prompt for each permission.
Grant consent
Still on API permissions, select Grant admin consent for your tenant name.
Confirm
Confirm with Yes. Every permission now shows the status Granted.
A Global Administrator, Privileged Role Administrator or Cloud Application Administrator can grant tenant-wide consent for these delegated permissions. Without consent, sign in fails with error AADSTS65001.
No admin at hand right now? Continue with the next part. When the app finds missing permissions after you sign in, a Global Administrator can select Sign in and consent for the organization in the app instead. See Sign in and activate your license.
Copy the IDs into the app
The app needs two values to find your registration. Both are on the registration's Overview page.
Open the Overview page
Open the Overview page of your app registration.
Paste both IDs
In the app's setup wizard, on the step Connect the app registration, paste the Application (client) ID and the Directory (tenant) ID into the fields with the same names.
Instead of the tenant ID you can also enter a verified domain, such as contoso.onmicrosoft.com.
Save
Select Save and continue. The wizard moves on to sign in.
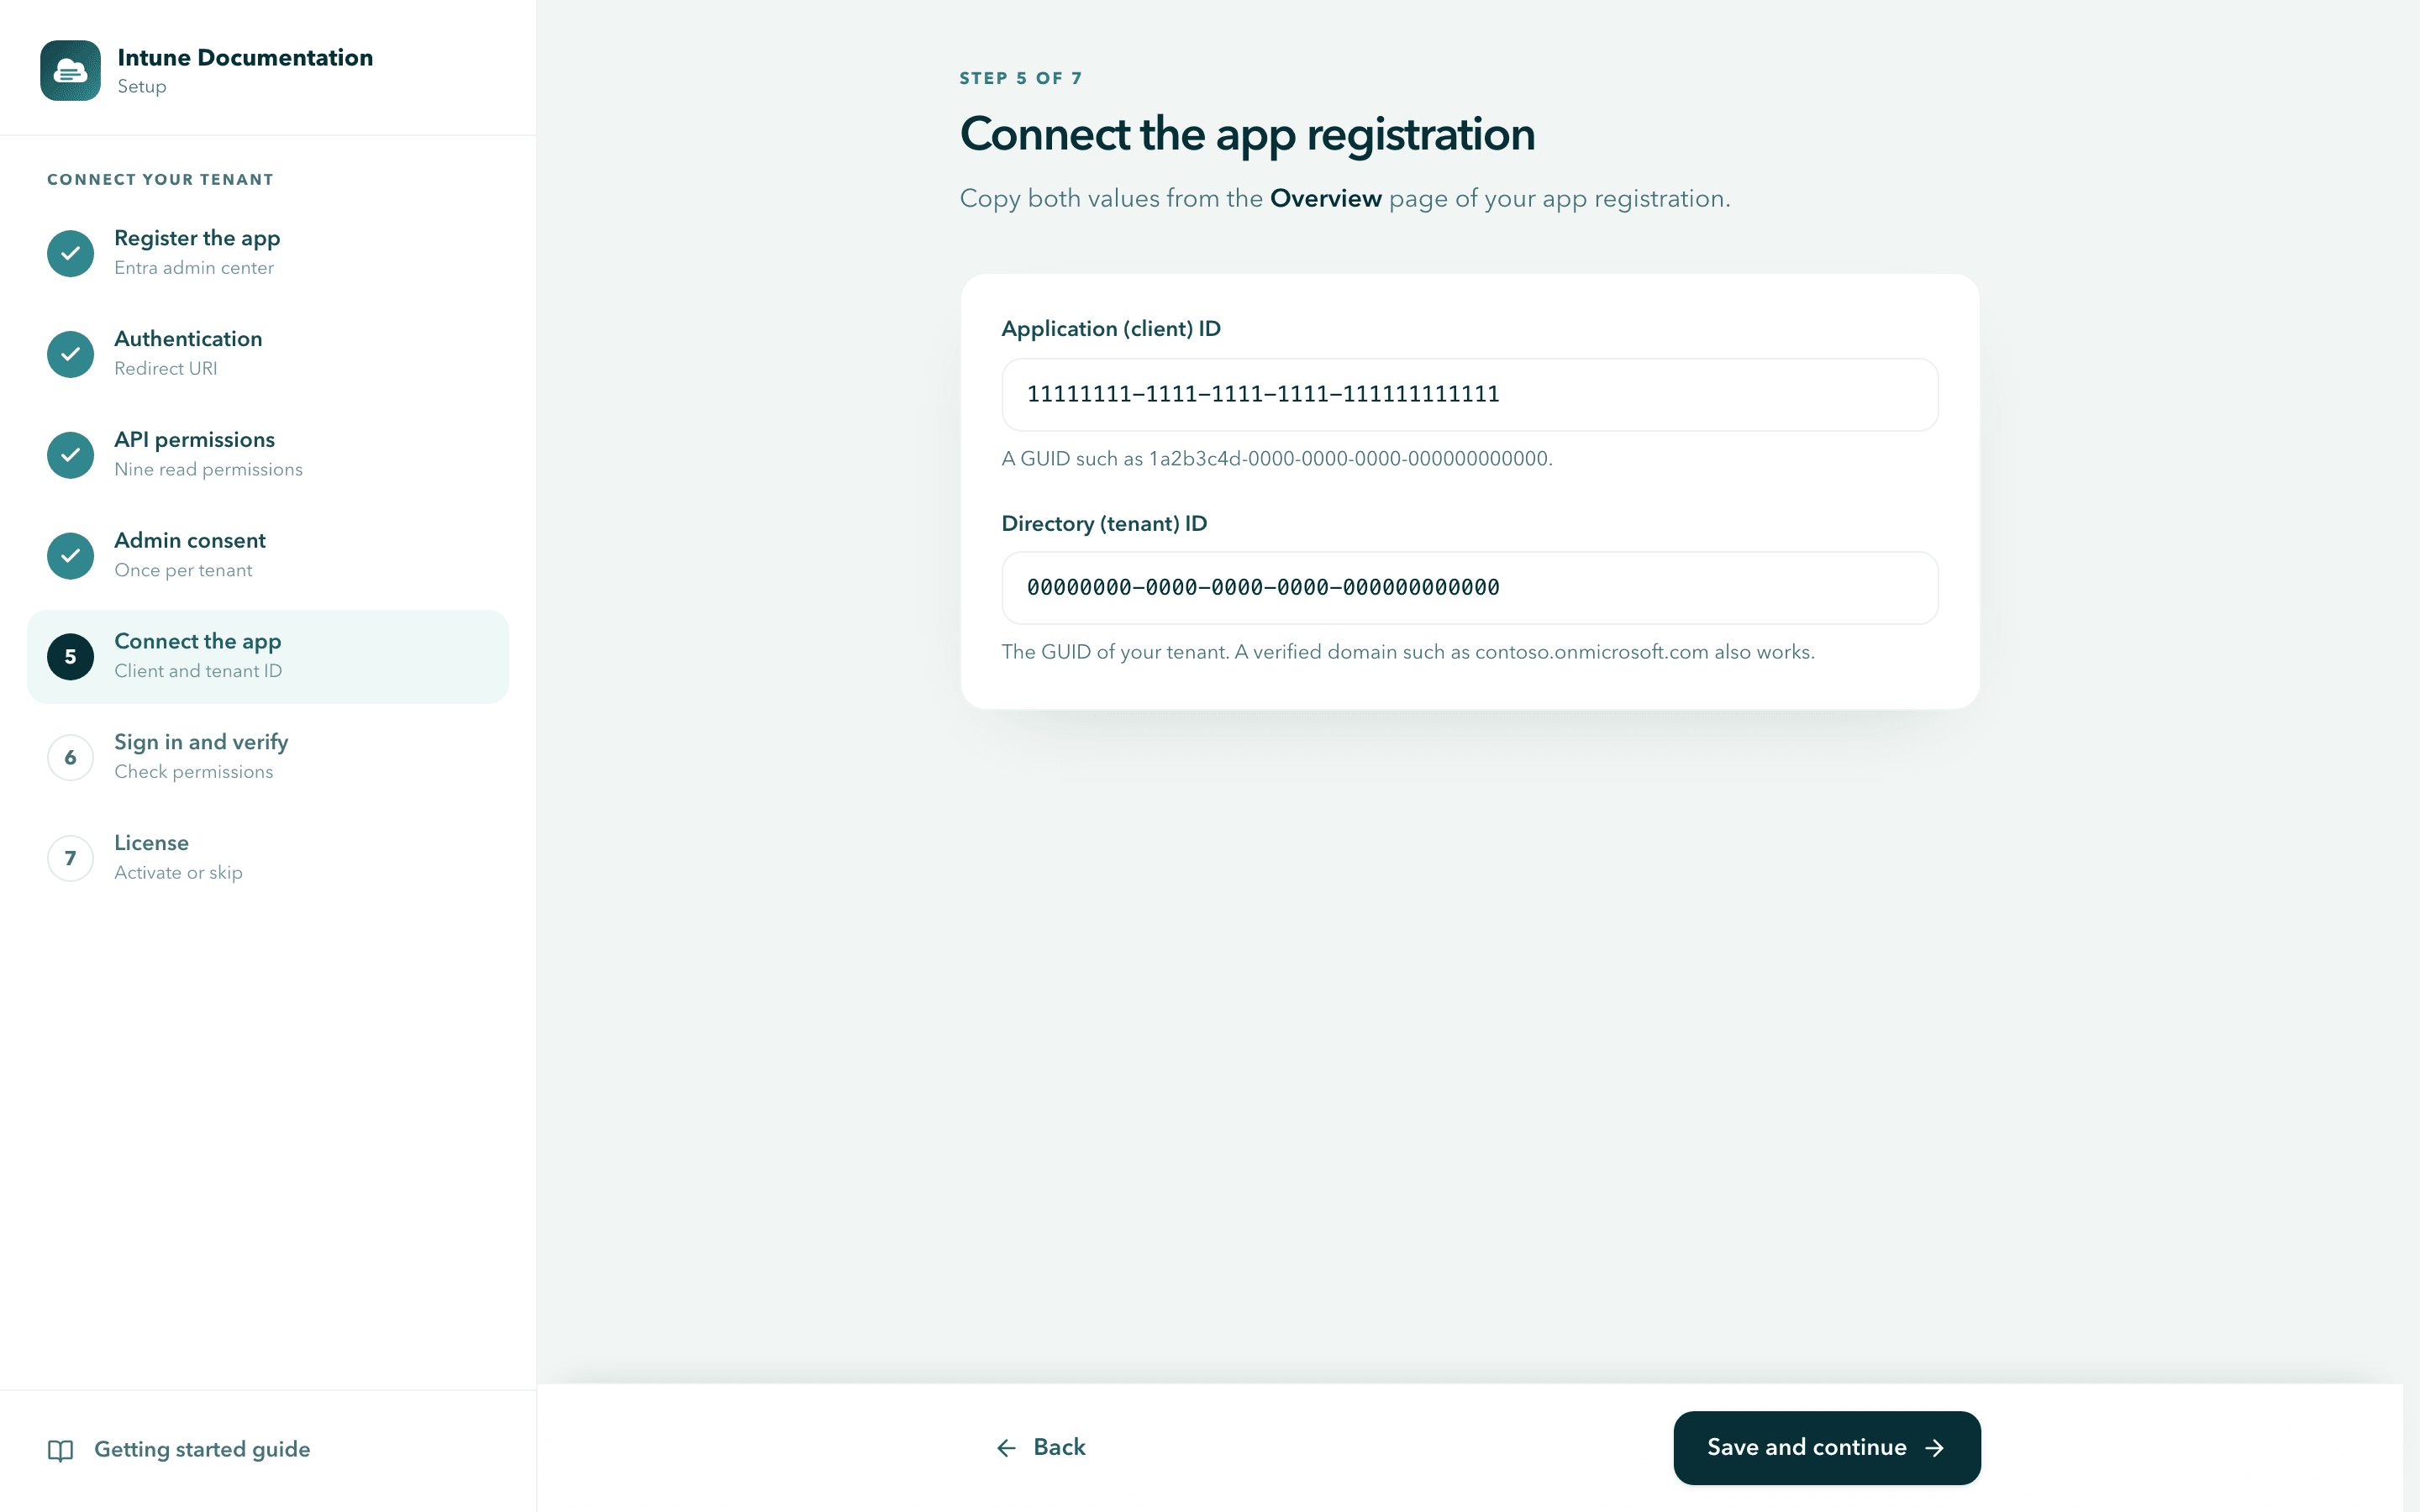
Both values are GUIDs in the form 00000000-0000-0000-0000-000000000000. Neither is a secret, and no client secret is needed.
If you change these values later under Settings, the app signs you out, and you sign in again with the new registration.
If something does not work
- AADSTS50011, the redirect URI does not match: the registration uses the wrong platform. See Troubleshooting.
- AADSTS65001, consent missing: admin consent has not been granted yet. See Troubleshooting.
- Some permissions are missing after sign in: see Permission gaps.